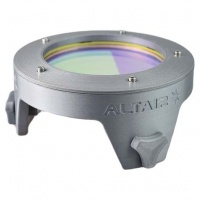
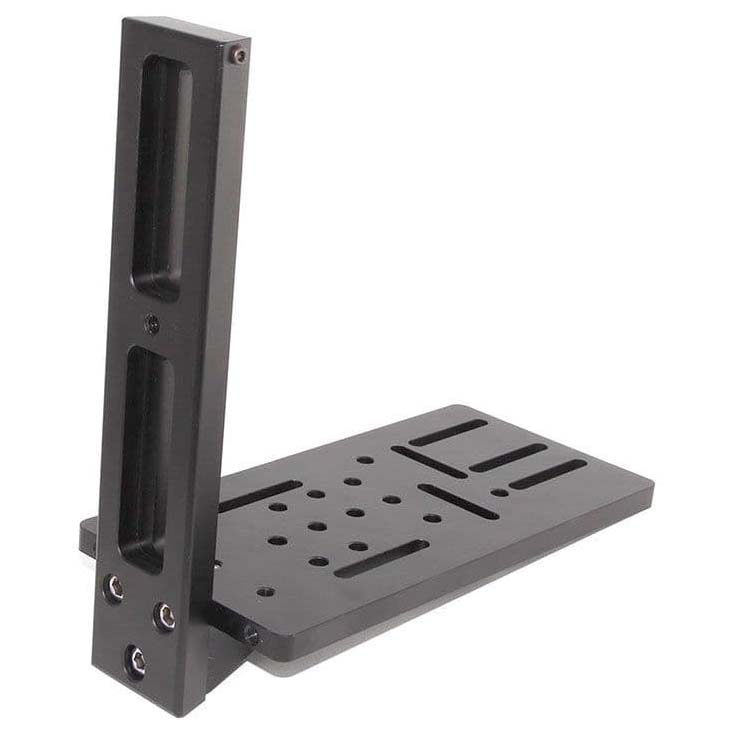
Altair Astro Skyshed 8 inch Observatory Pier (Heavy Duty with anti-vibration fins)
The original Altair-SkyShed pier is the only pier which can be adjusted in tilt and 360 degree rotation AFTER installation and tightening down the base bolts.
These unique structural and ergonomic features solve the most common issues of pier installation, distinguishing it from all other telescope piers. SkyShed Pier installation instructions here.
The features of the SkyShed Pier also make it the best selling pier worldwide, of all-time. The design is the brainchild of Wayne Parker of SkyShed Inc., the worlds most prolific observatory manufacturer, and often purchased with SkyShed POD domes and roll-off observatories. The "metric" version of the Pier is made by Altair Astro in the UK but using slightly oversize metric steel and fasteners.
A super-easy installation process, as well as only £7.20 UK courier mainland delivery and FREE included fixing kit, make the Altair SkyShed pier a compelling choice for any observatory, or free-standing telescope project. What's more, you can take your pier with you if you move house. Simply unbolt it, cut the studs off, and you are good to go.
The Altair SkyShed Pier is made from a rock solid 6mm thick 8" diameter zinc anti-corrosion coated + powder-coated steel tube, and is 36 inches in height (with a couple of inches in height adjustment possible). The use of laser-cut steel gives a nice professional finish to the product.
Altair SkyShed 8" Pier Unique Features:
- Can be adjusted in levelling and rotation AFTER installation, for a perfect job.
- 225mm diameter (8 3/4 inches) steel tube with 6mm wall thickness, and 6mm thick steel support fins make this the stiffest pier in it's size range. More metal for your money.
- A heavy duty product, but still with low enough weight (45kg) for easy installation and moving.
- Adjustable in height from 36-38 inches (the optimum size range for small or large SCT's and refractors on an EQ mount).
- Extensions or custom lengths available - please enquire.
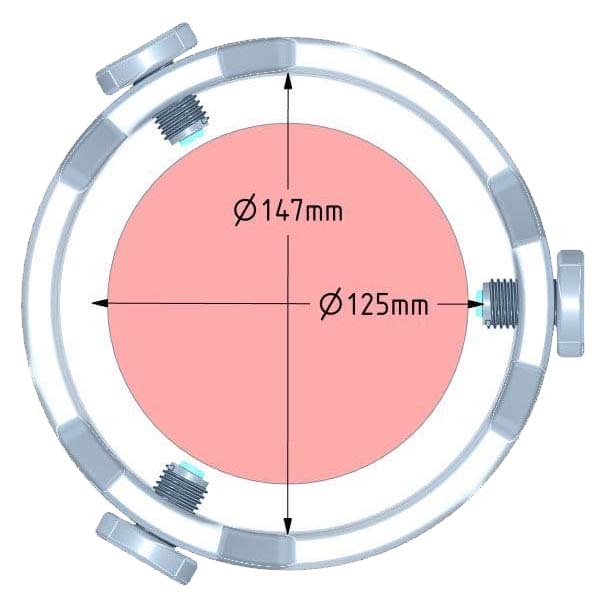
- Central through-hole 32mm diameter in base and mid-plate, allowing power and communications cable pass-through the base to the top-plate. Easy routing of cables - simply take the top cap off, pull them through and then fix it back on. No frustration, hunting for cables to pull through!
- FREE FIXING Kit, choose "L-bolts" if pouring concrete, or "Straight bolts" if you want to drill holes in an existing surface such as a concrete pad to glue the threaded rods in with chemfix.
- Anti Corrosion treatment. The pier is grit blasted, and then flame sprayed with a zinc metal coating for a better protection than normal galvanising. This product has marine durability. Our contractors use the same treatment for ship components. Even if you manage to chip off the powder-coating, the zinc anti-corrosion layer is fused with the steel. Your pier will last for many decades without corrosion.
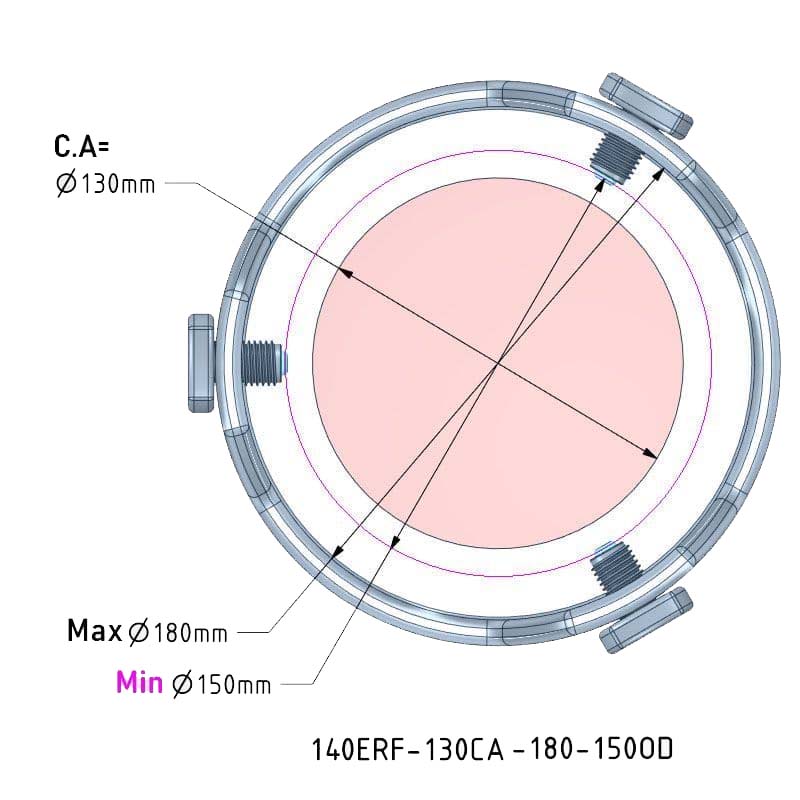
- Large, flat 320mm / 13" Dia baseplate, for easy access to the base bolts, with four stitch welded perimeter fins.
- 4x Massive 16mm bolts support the top pier plate cable of supporting well over a 1000kg in compression.
- Pre-drilled hole pattern for various pier adapters (see list below) as well as classic Meade and Celestron Fork mounts.
- Adapters available for most mounts (see compatibility list below).
- Perfect for any observatory dome or roll-off, including the Skyshed range.
- Can be shortened easily if needed - just cut the top off the tube with a bandsaw or plasma cutter. Your local metal shop or even a car garage can do it in minutes. Alternatively, place a special order with us. Changed your mind and need more height? We make custom extensions for a reasonable price - just get in touch.
More reasons to use a SkyShed pier:
Early DIY pier designs were based on a poured concrete usually within a tube, which is not only very difficult to move or take down if you change location, but also required an adjustable top-platform to make them level if they were slightly out-of-true. The Altair SkyShed pier has a cleverly designed steel top plate and cap, which are adjustable in both levelling AND rotation, then locked down with four 100mm heavy duty 16mm diameter steel threaded rods. The cross section of each of the four steel rods (201mm2 x4) gives higher strength than the pier tube itself, and immense stability, given their separation. Levelling the pier-top takes care of the first step in your GOTO telescope mount manual, and compensates for any tilt of the surface upon which you pier is mounted. Unlike other designs, if you get the concrete base slightly off-level, or are installing it on and existing hard surface which is usually slightly tilted for drainage, there is no need to add shims or washers under the pier to compensate, and you will always have a good, solid contact between the large base and surface, with a pleasing professional looking installation, no matter how out-of-true the base surface is. While equatorial mounts do not need to be strictly levelled to track polaris, GOTO accuracy is a concern, as is precision polar alignment. Consider, that if you pier isn't level, an altitude adjustment will make a small change in azimuth, and vice-versa, due to the tilt, so for every adjustment in Altitude, you would need to make a compensatory one in Azimuth to get precise polar alignment.
Aside from the adjustability and ease of installation, the material thickness, tube size, plus marine specification anti-corrosion measures, make this a compelling choice for a pier.
The SkyShed/Altair pier is not only the worlds, it's the UK's best selling pier design, ever. Over 20 years in production, much imitated, never equalled.
Infinitely adjustable and rigid:
The large 320mm steel baseplate is welded to an 8" diameter steel centre-column. Four large "fins" are welded to both the baseplate, and the centre-column, reducing flex and vibration to undetectable levels. This pier will easily carry mount/telescope combinations around 120kg in weight. The pier top-plate can be easily levelled with four (yes four!) 16mm (2/3") diameter solid steel threaded rods positioned at each corner. Once you have threaded your cables through the provided centre holes, simply level and tighten the pier cap down. Perfect levelling helps GOTO accuracy, and to eliminate polar field rotation relative to the horizon. The pier-top can be rotated 350 degrees, making the process of pointing your mount due North to get perfect polar alignment quick and easy. Once pointing North, the pier cap is locked down with four 12mm bolts.
Attaching your mount:
The Altair SkyShed pier cap has a variety of holes to accept most Meade Wedges, as well as the Skywatcher EQ8 mount directly. For mounts requiring a countersunk hole, the Altair Multi Mount Pier Adapter (which supports most popular Chinese mounts), can be fastened in place with the provided bolts. Celestron AVX, Paramount MX and special extra smooth EQ8 Pier Adapters are also available. You aren't constrained to one type of mount, because the top plate is large and flat, so you can attach pretty much anything to the Altair SkyShed Pier. For more adapter info, see the respective product pages.
Levelling and rotation is important for good GOTO and easier, more accurate polar alignment:
All major mount manufacturers recommend setting up an Equatorial or Alt Azimuth mount as level as possible, and aligned to the North/South axis. Without accurate levelling Equatorial Mounts are difficult to polar align The only way to ensure your mount is perfectly level is with the four 16mm thick steel threaded adjustment rods, which allow small incremental adjustments with a spanner once your scope is mounted. When the pier-cap is tightened down, the levelling rods keep the pier top perfectly level, even when tested with large scopes and mounts adding up to well over 100kg total weight. Now your mount is well balanced causing negligible torque. Don't fall for cheaper designs which don't allow rotation or rely on "shims" (basically washers) for accurate levelling. It is not possible to perfectly level anything with shims because they have a set thickness and it would be a very lengthy process. The reason these designs are cheaper is because shortcuts have been used to reduce fabrication and coating costs. When you get that dream rolloff observatory or dome built, or make your own, this is the only solution to get 100% right designed by astronomers. We have replaced many piers from 3rd parties which have suffered various problems from corrosion, to a frustrating inability to level or rotate them in Azimuth.
Precision materials and zinc coating for longevity:
No other pier comes close in material and anti-corrosion coating quality. The pier components are laser cut from steel plate, then the base plate and anti-flex fins are welded to the 8" diameter steel column on a jig for perfect alignment. This results in a pier which is as light as possible for ease of installation, while remaining extremely rigid. The piers are then sand blasted to prepare the surface, then flame-sprayed with zinc. At the time of writing, no other pier product has this expensive coating process, which is better than galvanising, and is often used for industrial and military marine applications where a professional finish is required. Once the flame spraying process is complete, the piers are placed in an industrial oven and powder coated with Matte Black RAL9000. This creates an extremely tough coating which not only creates a perfect finish to the product, but also protects it against knocks and wear and tear. Even if you manage to chip the powder coating, the zinc undercoat prevents corrosion. This two layer coating technology is far superior to painting processes, and provides the ultimate in durability lasting many years.
FAQ:
Why get an Altair SkyShed pier?
It's ultra-stable, and you don't have to keep re-aligning your telescope mount every time you use it. It can be conveniently moved if you move observing locations, and it's a must-have if you have an observatory, creating loads of space around the telescope - no more bumping into tripod legs in the dark, and causing wasted sub-frames during a good imaging run. Of course you don't need an observatory to have a pier many customers erect their pier on decking or a surface in the garden and leave their mounts on it with a cover. The four steel pier fins have holes at the tops enabling you to hook a cover on with bungee cords.
Why the Altair SkyShed Pier design?
It's the easiest pier to install, period, and the special adjustable pier-head saves you set-up time. Pier levelling and rotation can be adjusted AFTER installation on the base! This is the most innovative pier on the market, and the first to sport this feature. It's for customers who appreciate a good quality finish, and a nicely made product due to laser cut steel, and a beautiful matte "automative grade" powder coated finish. Our piers are grit blasted before coating too. No spraypaint over unblasted steel, no single coat of DIY-quality "rust resistant" paint which will chip off and corrode, and no amatuer welding. This product is professionally built to last.
What's the benefit of post-installation adjustment?
The pier head can be locked in any position, at any time. That means there's no need for perfect North alignment of the base bolts, and even if you get the base levelling slightly wrong, you can still ensure your mount is perfectly upright and aligned North/South. That means you don't have to be a DIY expert to install it and there is no need for "shims" under the base to level it! You can also lower and raise the pier head by about 6" by adjusting the 4x 16mm bolts around the perimeter.
What comes in the box?
The pier assembly and all bolts and nuts for the pier-head are included. Your choice of either straight or L-bolts and nuts are included for fixing the pier down to a new or existing surface.
How to I fasten the pier to a new poured-concrete surface?
If you're going to pour your own concrete, we suggest using a wooden template for the base and L-bolts and nuts. Simply cut a piece of wood to the same dimensions as the concrete you're pouring, and place the pier on top of the wooden template. Mark the 4x holes through the base, and drill holes for the L-Bolts. Then push the L-bolts through and fasten them to the wooden template. When you've poured the concrete, place the template on top, and allow the L-bolts to sink into the wet concrete. Remove any excess concrete and allow it to set. When you remove the template you will have the 4x bolts protruding, to which the pier can be fixed down using the nuts provided. (Click on the image gallery for step by step photos).
How to I fasten the pier to an existing hard concrete or masonry surface?
If you want to install the pier on an existing flat surface, choose the straight-bolt option when ordering instead of the L-bolts. Once you have drilled 4x holes in the hard surface which correspond to the pier base holes, you can fill the holes with "builders epoxy" and allow the straight studding to set before attaching the pier with the buts provided. Alternatively you can use your own expanding bolts and so-on, depending on the type of surface and your preference.
How do I attach my telescope to the pier head?
The pier is pre-drilled with 6x holes which fit our CNC machined aluminium Pier adapters for the iOptron iEQ45, Celestron CG5, Skywatcher EQ5, HEQ5, EQ6 German equatorial mounts (see the related products below). Installing a mount and adapter takes a few minutes - all the stainless steel bolts and nuts are provided to attach it. You can also easily drill the 13" diameter top plate with a normal drill with metal drill bit to accommodate your Meade or Celestron Wedge or a Losmandy Pier adapter - in fact any mount can be easily adapted to fit. Finally, you can bolt certain mounts directly to the top plate without an adapter or the need to drill holes - such as some Meade LX200 fork mounts and Astro Physics mounts with a 6 hole pattern. Here's our EQ8 Pier adapter ready to accept the mount head:
Specifications: Altair Skyshed 8" Observatory Pier with Anti-Vibration Fins
Altair SkyShed 8" Adjustable Steel Pier mount compatibility:
(The pier adapters connect to the pier top plate using 4x M8 cap-head screws, fastened by nuts underneath).
- iOptron CEM60 & CEM60-EC (requires PAD-MULTI adapter)
- iOptron iEQ45 (requires PAD-MULTI adapter)
- Skywatcher EQ6 & Celestron CGEM (requires PAD-MULTI adapter)
- Skywatcher EQ8 (recommend PAD-EQ8 adapter)*
- Skywatcher/Celestron HEQ5, EQ5, CG5 (requires PAD-MULTI adapter)
- Paramount MX (recommend PAD-PMX adapter)*
- Paramount My-T (requires PAD-PMX adapter)
- 10 Micron GM1000 (requires PAD-EQ8 adapter)
- Celestron AXV (requires PAD-AVX adapter)
* For visual observing with the 8" Adjustable Steel Pier, it is possible to fit the EQ8 and Paramount MX Directly to the pier top and secure the bolts with nuts on the underside, however the machined aluminium PAD-EQ8 and PAD-PMX Pier adapters provide a much smoother surface for easier polar alignment.
Step-by-step installation instructions:
If you're installing decking (the best way to mount your POD observatory dome), we recommend you leave a gap between the decking surface and the pier to isolate it. This avoids vibration caused by people moving around on the deck. We recommend using a wooden base-template (basically a flat piece of wood) which is then is flipped over to set in the concrete. This gives a nice flat surface, and positions the holes perfectly to match the pier base. For existing concrete surfaces, you can request straight bolts instead of L-bolts. These can be inserted into pre-drilled holes and bonded in with building epoxy. Don't hesitate to call us to email or call to chat if you need advice about installation.
Step 1
Dig a hole about 3 feet deep and at least 15"x15" width or larger, to match your base-template. We recommend making a "former" around the top to contain the concrete and keep things neat. This can be square or round - just make sure the edges are level and pack in the earth at the sides to hold it in place. Now's the time to throw some old and clean, non-organic rubble into the hole.
Step 2
Screw the bolts into the base-template and point the L sections inwards. Do a "test fit" as above before you pour the concrete. Make sure the bolts are firmly mounted, and stand upright. Leave about 2" or more of the bolt protruding through the base-template.
Step 3
Pour in the concrete, then flip the template over, and gently press it into the concrete until the template sits flush with the edges of the former. Leave it for a day or so, until the concrete sets hard.
Step 4
Build decking around the pier block ensuring it doesn't touch the former (you can leave the former in), then finish off the decking so that you have a removable section in case you want to unbolt and move the pier in the future.
At The Widescreen Centre, we prioritize prompt order processing and dispatch. We strive to dispatch all orders on the same day or the next working day, depending on the time of your order. We hold extensive stocks to ensure that your items are ready for immediate despatch. Please note that the cut-off time for same-day dispatch is usually 1:30 p.m.
For delivery within Mainland UK, we use reputable couriers to provide efficient service. You can expect your package to arrive in 1-2 working days. Please note that a signature may be required upon delivery to ensure a secure receipt.
In the case of special order items, the delivery time may be longer. If you have any concerns or questions about the delivery of your item, please don't hesitate to Contact Us. We are here to assist you.
Should there be any delay in dispatching your order, we will notify you to keep you informed.
Please be aware that The Widescreen Centre cannot be held responsible for any postal or third-party delays that may occur. We are committed to providing a reliable and efficient delivery service for our valued customers.
For more information please click here